We are closing.

 Documentation
This plugin allows you to easily integrate SublimeVideo with your WordPress site. It automatically connects to your SublimeVideo account, gathers the necessary license information and provides an easy-to-use visual editor that will help you generate shortcodes for your videos.
Check out the short demo video below to see just how easy it is to use.
sublimevideo-official folder to the /wp-content/plugins/ directory. Alternatively, you can install the plugin via the Install Plugins section in your WordPress admin area.Go to your WordPress Media Library and upload some video files and poster images (if your assets are hosted externally, you can skip this step).
Click the ![]() button to access the “Add SublimeVideo” pop-up panel. It is composed of 3 sections: Poster frame, Video sources and Live preview (initially hidden).
button to access the “Add SublimeVideo” pop-up panel. It is composed of 3 sections: Poster frame, Video sources and Live preview (initially hidden).
Please note that it’s currently not possible to upload media directly from this popup.
Note for YouTube videos: If you want to use the default poster frame from YouTube, don’t choose any poster frame here.

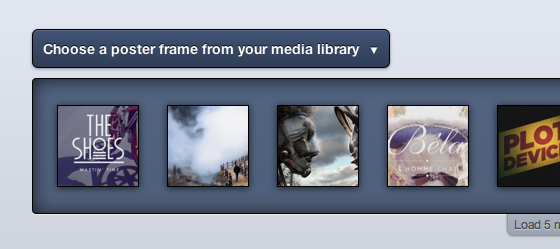
The SublimeVideo WordPress plugin’s poster frame browser.
Images in the browser are ordered by date of upload. Simply click an image to choose it as the poster frame.
If your poster frame is stored on an external server, you can click the “Or use an external URL” link to directly enter the URL of your poster frame.
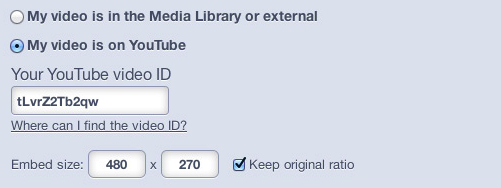
YouTube video

Copy and paste the YouTube video URL into the “Your YouTube video ID” field, and that’s it!
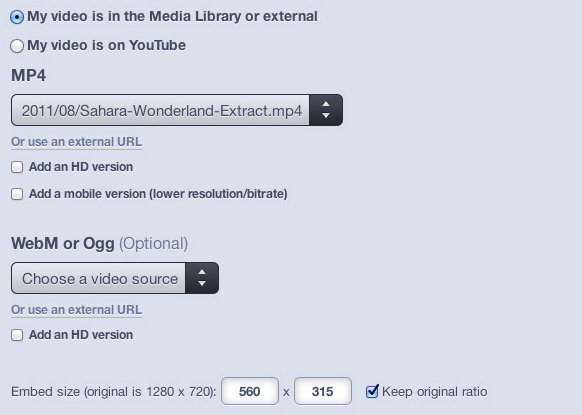
Media library or external video

Learn more about video formats and encoding on this page.
You must provide at least one MP4 source. Learn why here.
You can change your video size, but we recommend always leaving “Keep original ratio” checked to avoid seeing black “letterbox” bars on the top and bottom (or sides) of your video.
You can also add a mobile-specific version (with a lower resolution/bitrate than your primary MP4 source) by checking “Add a mobile version” and selecting a video file.
If your video files are stored on an external server, you can click the “Or use an external URL” link to directly enter the URL of a video file.
The live preview section will appear once you’ve chosen at least one video source file and is updated each time you make a change (to either the poster frame, video source files or video size).
When you’re satisfied with the result, click the “Add to my post” button. This will generate and insert a shortcode into your post.
If you want to modify this shortcode, please see the two next sections.
A basic shortcode generated by the plug-in looks like this:
[sublimevideo poster="video-poster.jpg" src1="video.mp4" src2="video.ogv" width="640" height="360"]If you want to use the lightbox feature, the shortcode is slightly different. It is composed of two parts ([sublimevideo-lightbox attributes...] and [/sublimevideo-lightbox]) that wraps around the initial element and will trigger the opening of the lightbox. Here is a simple example:
[sublimevideo-lightbox poster="video-poster.jpg" src1="video.mp4" src2="video.ogv" width="640" height="360"]initial element[/sublimevideo-lightbox]The initial element can be an image or a text. To use an image, click the “Add Media” button. When you’ve made your choice, be sure to set “Link URL” to “None” before clicking the “Insert into Post” button (the lightbox takes care of wrapping the initial element inside a link).
[sublimevideo poster="http://yoursite.com/your_video_image.jpg"]We recommend using a poster frame with dimensions proportional to the width x height attributes present in the shortcode.
[sublimevideo src1="http://yoursite.com/video.mp4" src2="http://yoursite.com/video.webm"]You can add as many sources as you want with the srcN attribute (as long as N is an integer). Sources are ordered by their N (i.e. src1 before src2, src2 before src3 etc…).
[sublimevideo src1="http://yoursite.com/video.mp4" src2="(hd)http://yoursite.com/video_hd.mp4" src3="http://yoursite.com/video.webm" src4="(hd)http://yoursite.com/video_hd.webm"]You can define a source to be HD by adding (hd) just before the URL. In the example above, “http://yoursite.com/video_hd.mp4” would be the HD version of “http://yoursite.com/video.mp4” and “http://yoursite.com/video_hd.webm” would be the HD version of “http://yoursite.com/video.webm”. Learn more about HD Switching.
[sublimevideo settings="initial-overlay-enable:false; volume-enable:false"]You can set any Player settings through the settings attribute.
To learn more about the settings you can set, please consult the Player settings page.
[sublimevideo uid="unique_id" title="A nice title here"]You can set the data-uid and title Player settings through the uid and title attributes.
data_uid and data_name are now deprecated, but will continue to be supported for back compatibility reasons.
To learn more about the data-uid and title attributes, please consult our Real-Time Statistics add-on page.
[sublimevideo-lightbox lightbox_settings="overlay-opacity:0.9; on-open:nothing"]Play video[/sublimevideo-lightbox]You can set any Lightbox settings through the lightbox_settings attribute.
To learn more about the settings you can set, please consult the Lightbox settings page.
[sublimevideo autoplay]Automatically plays the video upon page load.
Please note that only the first video with the autoplay attribute will actually autoplay upon page load. SublimeVideo currently doesn’t allow multiple videos to play simultaneously.
[sublimevideo loop]Loops the video once its playback ends.
[sublimevideo id="a_unique_id"]Allows you to set a DOM id for your <video>. If you don’t set an id, the plugin will generate one for you.
[sublimevideo class="sublime another_class"]Allows you to set CSS classes for your <video>.
Be sure to add the sublime class manually if you use this shortcode attribute.
[sublimevideo style="display:none;"]Allows you to set CSS inline style for your <video>.
[sublimevideo preload="auto"]Allowed values:
none (default)autometadataSetting preload to “none” will save you bandwidth by preventing preloading (buffering) of the video upon page load.
Simply add settings="autoresize:fit" (or settings="autoresize:fill") in your shortcode, as follow:
[sublimevideo src1="..." width="..." height="..." settings="autoresize:fit"]Learn more about the autoresize player settings in the Player settings page.
Since the version 1.8.0, you can use the visual editor to set your YouTube video.
For older versions, or if you want to do it manually, please read the following instructions.
Let’s say you want to play the following video: https://www.youtube.com/watch?v=abcd1234
Simply add settings="youtube-id:abcd1234" in your shortcode, as follow:
[sublimevideo src1="..." width="..." height="..." settings="youtube-id:abcd1234"]Learn more about the youtube-id player settings in the Player settings page.
If you have any other issue, please visit our Troubleshooting page.
title shortcode attribute.data_name shortcode attribute.lightbox_settings shortcode attribute to allow to pass lightbox specific settings.youtube-id is set in the settings attribute, the uid is set to the YouTube video id.uid, name and settings attributes (mapping to data-uid, data-name and data-settings HTML attribute). See the Player settings page to learn more about these attributes.data_settings attribute (mapping to the data-settings HTML attribute).[sublimevideo-lightbox][/sublimevideo-lightbox].src1 declared after src2 was leading to a wrong sources’ order in the generated code.data_uid and data_name attributes (mapping to data-uid and data-name HTML attribute). See details.